It’s all about starting small…”Big Bird steps”.
I have a tendency to have big beautiful ideas and then the reality of the project sets in…. and then well it’s pretty much dead in the water and how FUN is that???
MANAGEABLE: A little bit of planning will save you time, money and aspirin.
It may be as small as a few planters with herbs on the sill, a “no-dig” bagged soil garden out the back door, a more defined straw bale garden, or a raised bed or two. Remember, size does not matter it’s what you do with what you have that counts. I’ve learned success in gardening comes with a good foundation…soil. But it doesn’t mean you have to break your back to get there or kill the ceramic piggy. All of these growing concepts will have brilliant results and end up producing wonderful compost for whatever your permanent solution may be.
How it played out in my neck of the woods:
Year One: (2008)
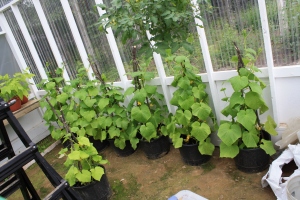
I was fortunate enough to start with constructing a greenhouse (1) out of leftover materials from building our house. It took an additional two years to buy all of the Lexan to finish the sides and back, which were temporarily covered with 6 mm plastic sheeting. My garden that year consisted of 20 tomato plants growing in their pots in the new greenhouse.
Year Two: (2009)
I started my seeds in the house, on a fold out table in the living room with newspaper pots (2). Not the BEST idea, but hey what can I say…..it had sunshine and I’m CHEAP.
Once the snow melted, I added four 4’ X 8’ X 12” raised beds and upgraded to about twenty-five 7 gallon black nursery pots for growing containers in the greenhouse.
I’d mark 2009 as the point I started to understanding why living a sustainable lifestyle is important and researching ways for it to be successful in Alaska. It wasn’t a foreign concept having a long family history of hunting and gathering, but let me tell you, living in a society of convenience assuages the natural instinct to fend for yourself.
Year Three: (2010)
I planned a head; starting my seeds earlier with one large grow light in the garage. I wanted to add more raised beds but ended up concentrating on growing bigger and better fruits and veggies.
Year Four: (2011)
I ordered my open pollinated seeds online AND actually READ the back of the seed packs. Go figure…..they put growing information back there! Put together a nice little planting schedule; counted back from our last frost date which is usually May 15th and outlined the weeks I had to start which seed. However, I realized too late that I should have included the week or two of germination time. OOPS! No biggie! In the end it worked out beautifully…
…Until most of my baby seedlings were violently choked out by the “dampening off” fungus. Apparently, this occurs when you don’t use fresh potting soil every year, but what if you put your used potting soil outside to be frozen during winter??? I’m still not sold (*giggle*) on paying $40 for DIRT! It just doesn’t make since.
Spring 2011 comes and I find myself pouting about the quality of my dirt…or lack thereof.
SOIL: Having heavy clay deposits, I could’ve purchased good humified compost to get started, but that still kind of goes against the grain of the “frugal sustainability” game I play.
Really…What is “sustainability” if you just run to the store to fix the problem, right? So I did some experimenting with a couple of lasagna beds.
Lasagna gardening is based on building layers of organic material to plant in; much like a compost pile.
My Recipe:
- Straw for structure, air flow and moisture retention
- Chicken manure for the 1% Nitrogen (N) content which is the second highest to bunny poop at 2%.
- My dirt for local microorganisms and to help hold the nutrients from washing to the bottom
- Bone Meal promotes healthy root growth with 12% Phosphorus (P)
- Lime to counter the acidity of composting straw.
- Epsom Salt for magnesium. It is touted be beneficial to the photosynthesis process and helps promote the availability of other nutrients. Tomatoes love it!
- Ash for the 3% Potassium (K) to help in the production of the fruits and veggies.
I started with turning over the soil in a 2′ X 16′ row in my greenhouse and breaking up the large chunks. Added a 6” layer of straw and watered it down. I chose straw because of its hollow structure thus helping with air flow, as suggested when researching composting. Then I added a 3-4″ layer of last year’s chicken manure and watered it down to make good contact with the straw. Next came a 2″ layer of my own dirt, sprinkled with bone meal, lime, Epsom salt and ash, then watered to wash some of the additional nutrients in with the manure and straw. Now…..”Rinse and repeat.” I had enough materials for two layers, which gave me 12” of growing medium.
The whole process took about an hour and once it was all watered down…I let it set over night. Planting in a bed like that is as simple as shoving your trowel into the straw and wriggling open a hole. The next morning I eagerly planted my pumpkins, green beans, tomatoes, black beans and a soaker hose… then…add some sunshine and….VOILA!!
The Sugar Pumpkins and Provider Green Beans really love what I’ve done with the place!!!
(1) More later on the TRUE greenhouse effect and how to use it to your advantage. There is always a way to start small…do not condemn a wine bottle to the landfill.
(2) Newspaper pots are ideal for seedlings that need a lot of room or do not transplant well, i.e. corn, melons, squash or cucumbers.


